Wednesday 29 May 2019

Wherever you are planted... Journal Page

Back working in my 5'x7' colour journal.
Here is one of my favourite colour schemes,
Lime & pink!

 Not sure I am keen on the edited picture,
but this was the best shot.
I first stamped Hero Arts Vine Leaf stamp
from the top right side of the background.
I then stencilled over it in Dylusions
Fresh Lime using the Arabesque stencil,
Over this I stencilled Tim Holtz Blossom.
I used Bubblegum Pink Dylusions to
colour my texture paste before applying.
I toned it down with a gesso wash.
Once everything was dry, I added silhouette stamping
& then added black die cuts both Tim Holtz.
The words are computer generated.
They are a French Proverb.
"Wherever you are planted, bloom with grace. "
These words are very apt with regards my current circumstances.  

Monday 27 May 2019

Find Your Voice - Junk Journal

If I thought I loved Mildred,
then I must have a lot of love as I
love this one too! 😁
This idea came to me while watching a video 
on YouTube by Mike Deakin Art.
Mike created this page last year 
& I wanted to revisit the background he made
after watching this other video by him;
I loved both background ideas & they 
inspired me to create this page,
Find Your Voice.
 
I used Distress Oxide Inks
smooshed onto an old ledger card.
I added clear gesso first to give movement.
The colours I used were;
Peeled Paint / Shabby Shutters
Old Paper / Scattered Straw
& hints of Peacock Feathers.
I added stamping in the same colours
using bubble wrap, a bottle cap
& some ATC border stamps
(previously loved Elusive Images Set)
along with Archival Sepia Ink.
I added the word phrase Find Your Voice
several times (Donna Downey / Unity Stamp)
Then stamped Inkylicious Birds
in two places & on tissue.
I attached the tissue just off slightly to give shadow.
I then added touches of paint in buff & red. 
This made them Swallows.
Finally I added some words from Tim Holtz
to make up a part phrase I had seen on Pinterest.
 Love this colour combination, thank you Mike!

Friday 24 May 2019

Back with another Junk Journal page - Mildred!

Yes, I'm still so in love with my
mini junk journal, I can't stop
playing in it. 😀
Today's page is all about Mildred
& her desire to play at being Queen.
This page is an old business envelope.
I die cut a square from off centre
& added two die cut trellis square
pieces behind. It's gorgeous,
but I just can't remember where I got it!
 I painted them gold to give a regal touch.
I then set to work colouring the rest
of the page in purple using
Lindy's Stamp Gang Magnolia Magenta Gold.

Next I added stenciling with Original Distress Ink
in Dusty Concord & the Tim Holt Stencil - Gothic.

I stamped a dictionary quote about a Lady,
which was free with Creative Stamping issue 70.
The chair was free with the pets set in issue 68.
I used copic markers to colour it "throne" red.
I then sat my Tim Holtz Paper Doll "Mildred" on the chair
& gave her a pet dog (paper doll) 
I stamped crowns on the page (PaperBag Studios)
& Bird Notes by Crafty Secrets Clear Art Stamps.
(They were purchased, previously loved & I don't 
know if they are available now) 
Finally, I added a book text crown, a gold staff & words.
The words near her head were originally
from Tim Holtz but they disintergrated so I
had to hit the computer & type my own! 
The ones below were found poetry & only the two
words in blue stated intact!!
I am working on the back of this page,
trying to find something suitable to cover the chair (throne)
showing through from this side.
But, I absolutely LOVE this page.

Tuesday 21 May 2019

Card for Liz

This birthday card was made for Liz in April.
At the end of April, it was announced that
she was leaving Queen Bee Salon in Scunthorpe,
but as i had already made the card, I sent it c/o
the new place.

Materials used:
Stencil - Mike Deakin Art
Arch - Hunkydory Crafts - 
Moonstone Arch Windows dies.
Stamp - Stamping Bella Oddball -
Greeting Stamp - Clearly Besotted

This was another design using the fabulous Hunkydory crafts,
straight edged nesting dies - arched windows. 
I die cut a paper arch, stamped my image in B&W,
Put down the stencil & masked over top of the image.
After I removed the mask, I put the die on
& drew round it in black pen.
I then added wavy lines to give a more hand drawn feel.
I coloured my image & added her on top to get all the
swirls in the hair etc. as I do not have a die.

Sunday 19 May 2019

A new page in my junk journal

I am really loving two things at the moment!
The first, is watching the bees
laying eggs & sealing the tubes
in my bee houses.
(more pictures will follow)
and the second,
working in my handmade junk journal.
This is the fifth page &
I am already working on pages
7 & 8 at the moment.
Page 6 has been missed out for now.

Family share your dreams.
 This is a closer look at the background.
I did double textured layers with stencils.
The first layer was with clear gel medium,
the second, texture paste.
The page was coloured with Lindy's Stamp Gang 
sprays & magicals as well as mixed
into the gesso layer.
The stencils are;
Altenew - Leaf burst
TCW - Rebekah Meier - Floral Radar
Numbers stamped in background
are a from Paperbag Studios - set Laugh
these were purchased as a previously loved set.
Paper Dolls & words - Tim Holtz Idea-ology

Thursday 16 May 2019

Another Blue & Orange Page for my Colour Journal

This is a "Wart's & All" series,
so I shared my first page of Blue & Orange.
I really didn't like it & was determined
to pull something better together.
I think this is it!!

 
First of all I have to give a shout out 
to Amber. K. Creative.
I saw her create a background in this YouTube Video
& I liked it so much I wanted to try it.
I like how it turned out, although
the clear crackle isn't obvious.
I think I should have added it over a lighter blue
then added the darker blue later.
Proof that this journal is not just
an exploration of colour, but a way of growing.
I am using my supplies & getting to know them.

Materials;
Tim Holtz Lattice Trellis Die
Heidi Swapp Script stamp
PaperArtsy - Twilight fresco paint
Dina Wakley Media - Cheddar paint
layering stamp & die set
Tim Holtz words - Stay Simple. Be Original.
I used my speedball brayer for the first time.
I have tried many brayers, but I believe
this one is the best of them all.

Tuesday 14 May 2019

Colour Exploration Page 8

It's been a while I know!
I got all excited about creating my junk journal
& this page was proving difficult to create
as I originally visualised it!
In the end, I did have to scrap it & start again.
It had turned to mud, despite everything
& just was not worth saving.

I am however, glad I had a second chance
to create what I imagined.
My background colour is created with 
Dina Wakley Media Scribble Sticks.
Lemon & Blackberry with a bit of Magenta
accidentally thrown in!
I also added gelatos through stencils for
extra texture in the background.
I created the circles using a mylar
home made stencil - basic circles.
Finally I wanted to add my favourite burnt lemon juice
to age it but only had lime in the fridge!
Lime doesn't not turn as golden as lemon.
Note to self - Jif lemon on the shopping list.
I used molding paste then gesso over the top.
 That looked too stark so added colour
with the scribble sticks.
Stamping is Vintage Circles - Woodware
Words - Tim Holtz
"it's always the small pieces
that make the big picture".

Saturday 11 May 2019

Junk Journal Insert

I have been delighted by the wild bees
visiting & using my two Bee Houses. 
Four have slept in one of the houses
during all the wet weather this week.
Here are pictures of the houses.

 Here is a little guy moving in.

Now as the bees have been in the forefront of my mind,
it seemed fitting I add them into my art.
I knew I had page 3 (the first insert) to decorate,
so I decided to decorate both sides with
a bee theme, so they carry on from each other.

side 1 - page 3.
 Beehives /bee stamps
Ribbon & papers
Tell the Bees Collection - Craft Consortium.
Seriously, if you have never been to the store,
be prepared to be blown away by all the
gorgeous paper & stamps, not to mention
matching sequins, ribbon & much more.
Also be prepared to spend a lot!
Other products used;
Memory Box Stencil,
Dylusions sprays in Tangerine Dream & Lemon Zest,
both as sprays & mixed in with the gesso.
For the honey, I used the ever so gorgeous
Dina Wakley Media Cheddar Heavy Body Paint.
The words are computer generated & are a quote
by Elizabeth Lawrence (1904 - 1985)
"The hum of bees, is the voice of the garden"

side 2 - page 4.
 This was created with the same medium,
just no cheddar on this page. I also did
negative stenciling on this side. 
The Sunflower is a Memory Box Die
I cut two so I could introduce depth.
The quote, also computer generated,
is by Mark Nepo.
"The flower doesn't dream of the bee.
It blossoms & the bee comes."
 

Monday 6 May 2019

Page 1 - Fragile Beauty

So, after a tiny tweak,
here is page 1.
I outlined the computer words
with an Inktense pencil & it completed it.

As you can see, the page from Daphne's diary
had faded Hydrangea blooms,
so I mixed the paint to match the colours.
I then used a stencil free with the same
magazine as the stamp, used for page 2.
I used texture paste. 
Once dry, I over painted with some of the
mixed paint & rubbed gold paint over some of
the raised blooms for highlights.

Saturday 4 May 2019

Birthday Wishes for Claire & for Rod

Today is the birthday's of both my ex.train
buddies, Claire & Rod.
Here is what I made for them.

This first card was made back on 10th April!
I knew she liked giraffe's, so when I saw this
stamp by Pink Ink Designs, I knew it was perfect.
I toyed with adding the glasses, but they
wouldn't cut out right & there are no dies.
I coloured all the leaves & flowers with Copics,
in very vivid colours, to resemble
summer in a jungle.
I love how the Copic shading worked on the giraffe.
Those eye lashes are so gorgeous, to make sure that 
I kept those & all the swirls, I stamped in black
directly on the card base & stuck my coloured,
cut out image on top.
 

Next up is Rod's card.
Donna, (his lovely wife) advised he liked feeding the birds.
I vaguely remember him mentioning it during
the train journey, but once Donna confirmed,
I was able to create this for him.

 I can't take complete credit for the design 
as it is something I saw Sandy Allnock do in a video,
but I adapted it to suit my stamps & idea. 

Front depicts decoupage Robin on nest box.
Papermania Home to Nest.

Inside shows the full card.
The panel on the left, blank for my message.
On the right, my bird scene.
The card began as a piece of 320gms cardstock,
that measured 14cms x 30cms.
I rarely use cms, but it was called for to design this
exactly how I wanted it.  
I then scored the piece at the right end to allow 
1/2 cm & the rest folded back onto itself.
I also created a tiny 1/2cm spine in the centre
of the remaining card stock, for this card.
I created another piece measuring 14cms x 15cms,
& made a 1/2cm spine, allowing the rest to fold under.
This was the stamped piece.I built up my shaker element, 
so that it was concealed once spine was attached
in front fold & top was folded onto the 1cm flap on 
right edge. I die cut fun foam to cover the whole back,
cutting the bird feeder from within.
Sounds complicated but it wasn't.
 

This final close up shows the "bird seed" shaken down.
I used 3 colours of seed beads for this.
Stamps & papers are all Home to Nest.


Thursday 2 May 2019

Page Two of Mini Junk Journal

Here is page two!
I know, I can hear you saying now,
"Why not page 1?"
Answer is simples,
I'm not sure if I want to do something 
else to it just now! 
I am not 100% happy with the computer
generated words, they seem stark.

So here is one I am happy with. 😃

I had mixed some paint for page 1, using
Anita's Acrylic - 11044 Coffee
DecoArt Americana - DA179 Alizarin Crimson
this way to make a dusky brown/pink.
The page had faded Hydrangea blooms on it & I
wanted my page to reflect the colours.
I had a bit left, so as I hate waste, I used
it on several pages including this one.
I used ColourCraft Gold Metallic paint
& the stamped image (free with Simply Cards & Papercraft 160)
was coloured with my trusted Derwent Inktense Pencils.
 
 Plus, here is a sneaky peak of page 3!
One side of the Bo Bunny packaging insert
coloured with the excess paint,
stencilled (Tim Holtz Texture Fade) 
& texture paste through the,
Memory Box Honeycomb stencil.


Wednesday 1 May 2019

Mini Junk Journal

I have been missing a while, I know!
I am still busy finishing up some birthday
card for June & a small album, 
using Hunkydory crafts arched dies.
I am still working on the Exploring Colour Album,
but I decided to have a clean out!
The entire craft room was sorted (AGAIN)

Anyway, I have been seeing many people making mini junk journals
to art journal in. Mixed Media Jenn, Jennifer Engle, one of my fav
on YouTube, likes to work on small scale
& I used to love making mini books years ago.
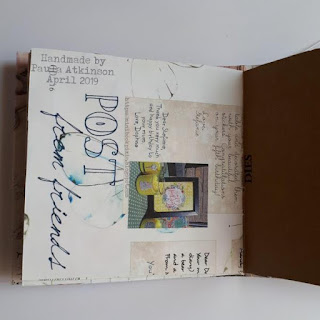
So I made a junk journal from my old Daphne's Diary
Magazine Collection 😊
here are a few piccies!

Front Cover 
I stitched the Dior ribbon (from a gift) into the spine.
Disclaimer here, I stitched the pages in upside down.😬
After about an hour of cursing, I cut the binding 
& re stitched it the right way up!


Back Cover
Made the same as the front cover.
Two torn pages from my Dpahne's Diary,
glued down to card stock
using matt medium. Sealed & scored.
 

Inserts (Bo Bunny Stamp Packaging)

Daphne's Diary magazine page insert 
 

Other side of the Bo Bunny insert with left over paint.
The other page with stenciling is a business envelope.
 
I have already made two pages 
& will be sharing VERY soon!😊