Friday 27 December 2019

Winter Art Journal

Sharing a Winter themed art journal page
that I created just before Christmas.

This is kraft card (page 10) in my new journal.
I'm not creating in order so 7, 8 & 9 will
be created on in 2020.
I began by scraping gesso on the page, taking care 
not to go right up to the edges.
Once dried, I applied Golden Light Molding paste
over Winter Wonderland Stencil/Mask
by The Crafter's Workshop.
I dried this with my heat tool to make it
puff up so that the rings went deeper.
Before it was fully dry, I added a dusting of
Rock Candy glitter to give sparkle like you
see in real snow.
To colour my page I used watered down PaperArtsy
Fresco Chalk paint in Wolf Eye & Blue Smoke.
(Oct 2019 release, Christmas present)😊
I dry brushed white gesso over some of the
textured areas once the paint was dry.
I love the blue on the kraft where I had
not put down gesso first.
I busted out my Tim Holtz Ephemera packs,
(hoarded for two years)
to create a cluster of mainly B&W,
with just hints of colour in the text.
I then added my die cut deer (American Crafts die)
onto a simple wreath I made from jute.
The finishing touch was Tim Holtz Christmas Clippings
(also hoarded for two years)
I have also created another winter theme
 for my Colour Exploration Journal.

Thursday 26 December 2019

Merry Christmas Art Journal

I made this page on Christmas Eve,
it's the very first themed page in my
Colour Exploration Journal.
I wanted something festive & to be honest,
I was at a loose end waiting
for an ornament to dry.
I loved the Lisa Oxley repeated version of
Dina Wakley's ghost technique &
wanted to play with it again.
However, you can't see much of it 😄 
 To begin, I added gesso & once dry,
I wrote a Christmas song from my childhood
down the page.
I'm not certain if you are familiar with it,
I was 4 or 5 when we sang it, but
it goes;
Who is coming on Christmas Night?
With a red, red coat & hair all white.
Eyes that sparkle like a starry night,
I know, don't you?

Who has a bag all packed with toys?
With wonderful things for girls & boys.
A beautiful sleigh that makes no noise,
I know, don't you?

Every time I see an image of Santa (Father Christmas)
I always remember this song & 
how we sang it with such excitement.
 I used the repeated ghost technique with Dylusions,
Cherry Pie / Peony Blush / White Linen
& Tim Holtz Festive stencil.
I added Cut Grass through the stencil to give
a pop of colour in 3 places.
I then broke open my hoarded Christmas
Ephemera packs by Tim Holtz
& pieced together a few bits.
To complete I added Christmas Clippings
in two places. "Merry Christmas" &
"all to sleep before Santa comes"
 

Wednesday 25 December 2019

Merry Christmas & Happy Birthday

Merry Christmas to you all.

Today I am sharing a
Christmas Day Birthday card.
A mixed media card created back in October,
using recycled  brown paper,
gesso, texture paste, stencils,
lace, Lindy's sprays, sequins,
a die cut paper piece,
an image by Finnabair, a simple
white flower & a pearl.


Tuesday 24 December 2019

Christmas Eve second share

Gingerbread Card for Kate.
Front is an knitted jumper embossing folder,
free with Simply Cards & Papercraft issue 185
Card front imagery created from the
 die cut books from The Works.
All added to a Kraft base.

Inside the card was layered with white card.
At the top I stenciled clouds,
using a My Favorite Things stencil. 
Stamped a santa & sleigh.
I die cut Lawn fawn pop up hills for snow banks
& attached to it my Gingerbread House
by Sue Wilson. Along with all the decorations.
The tiny door wreath is from a Tim Holtz die set.

I die cut an XCut label for my greeting & added
 to the reverse of the card.
 This view shows the depth of the piece
& a closer look at the sentiment
which is a set by Crafter's Companion.


 This piece is for me.

It is based on the shadow box I shared yesterday,
except I applied Tim Holtz Poinsettia on all the 
front facing edges & the inside.
I poked holes through from the back
& added a set of 10 warm white lights
gluing the battery box to the base.


It looks a bit like a Mad Scientist/Professor 
attacked it from behind,
but who cares,
when it glows like this in the dark.
Mine says Let it Snow.

First of Two Shares today.

Another easel card to share.
 Front was created from the die Cut Book
purchased last year from The Works.
I believe these to be some really old
Studio Light books. As the format
is strikingly similar.
This shows a front facing view.
 This view shows the card looking down
& below shows a closer view of the 
inside decoration.
I used a Tim Holtz bookplate die cut 
several times to create depth.
I used Die Cutting Essentials issue 56
free dies to create the two floral clusters.
Adding pearls to finish off the bookplate
& some stamping.

Monday 23 December 2019

Another Special Card

or rather...
A Shadow Box.
From four residents,
Dad, Bill, Jenny & I,
that appreciate their Christmas Lights.
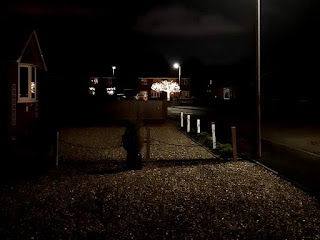
This is their tree from my front drive.

Here is the Shadow Box.
 Created from a sheet of 12x12 cardstock.
Scored & folded, with mitred corners,
which I covered with texture paste to resemble snow.
Globe - Tim Holtz die cut from blue painted paper
(PaperArtsy Summer Sky)
Wings were made with a mold & some two part resin.
Backdrop is white media paper, painted with
P/Artsy Summer Sky & stenciled with Tim Holtz
mini Poinsettia stencil.
Peace on Earth - die cuts - Tim Holtz
cut twice for depth, with Nuvo gloss applied.

Top view looking down so you can
get a feel for the depth.

I glued a piece of heavy weight chipboard
to the back & made a stand by tracing a photo frame
that i have. I glued it to the piece with UHU
& a 2.5in butt hinge because the weight of the
resin wings was pulling the piece backwards. 
 
 Another view of the hinge,
showing the neat finish.
For photo frames the stand is just short of
the bottom to give it a lean.
I wanted this to stand more upright,
so made the stand flush with the bottom.

 
In all I am very proud of this piece.
There were various videos on YouTube for
making shadow boxes.
I watched a few then kind of tweaked the
measurements to fit my purpose.

Sunday 22 December 2019

Couple more cards

for people I know from the internet.

This first card was created using 
PaperArtsy Summer Sky & Gesso,
over a card piece. drying well & then
I stenciled Golden Light Molding paste
through Mike Deakin Art Carnival 1 stencil.
Whilst this dried, I set it aside
& set to work on my clock.
It is the Tim Holtz Weathered Bigz die,
which I covered with Prima/Finnabair
Champagne Crackle Medium.
I die cut the word NOEL (free with the
Die Cutting Essentials issue 56)
from an off-cut of blue painted paper.
I then die cut the stems/leaves/pinecones
from the wreath die set (also in issue 56).
I dusted them with Tim Holtz Rocky Candy 
to give them a festive glow.
 

The card below began as a piece of blue painted paper,
which I added a few Tim Holtz Falling stars.
I then die cut two snowbanks using my Lawn Fawn
hill/snow border dies.
For the house, I cut a strip of houses from the 
die cutting Essentials free dies with issue 39,
(Summer Scenes) & cut off one tree & house.
I tucked this behind the snowbank.
Next I decided to die cut an aperture
from a card piece using a pine tree die by XCut.
I backed it with acetate from old packaging
so that I could add tiny silver sequins.
Finally, I die cut the word NOEL from
blue & silver & layered. 


Saturday 21 December 2019

Christmas Easel Card x2

I made two identical cards
for two close friends.
 Both cards were made from a total of 3 card blanks.

I began with the globes (Tim Holtz)
brayering paper with PaperArtsy paint;
Glacier Ice/ Summer Sky/ Smurf
Surf's Up/ Glass Blue/ Snowflake
& also white gesso.
Adding shimmer with Snow & Ice Cosmic
Shimmer Lustre polish.
 I used mixed media paper to make the blue
textured panels. Painting over french book text
using the same colours but in a wash.
I then added texture paste (golden light molding)
through the Tim Holtz Poinsettia mini stencil.

While allowing these to dry, I die cut my book plates.
Distressed with blue paint, stamped a greeting
& added pearls. Each bookplate is about
5 thick to add dimension. I copied this
from the pink toned card I shared a few
days ago on here.

 I added white feathers behind the
globes, which I mounted using
foam pads.
I created the banners by hand after
stamping the Peace on Earth,
which were from a free stamp set,
several Christmases ago.


Finally I added a blue star to the reverse,
 as I did the gorgeous pink toned easel card,
 from a few days ago.
 

Friday 20 December 2019

You guessed it!

More Christmas Cards!
Well I say this every year & I 
will say it again, I don't like to share until
I know they have arrived.

The first two images are of the card I make for
each member of our street. However, we lost three
last year & gained one, so I ended up with two spare.
I love this image because it reminds
me of hope & so I gave the two spare cards
to my ex colleagues, Kim & Lorraine.

 Stamp is Guardian Angel by Sugar Nellie
Background is Tim Holtz Falling stars
stenciled with texture paste
& iridescent medium to add sparkle.
Which I'm hoping the slight side view version shows.
I stamped peace on book text.
Added Ruby Slippers Nuvo glitter drops to
the heart pendant & shimmer pen to
both sets of wings.

This card is for the rest of my ex colleagues 
in the office.
I used the John Lockwood (John Next Door)
Sam's Starz  set & coloured it with
original distress ink - Tumbled Glass
& swiped over some Cosmic Shimmer Lustre
polish - Snow & Ice 
 I raised the star slightly in the centre
to give a different look.

Thursday 19 December 2019

Lucy's 18th Birthday

I can't believe my step-niece, Lucy
has already turned18!!

 I made this using coloured molding paste,
but it came out too pink,
so I coloured over it again with Seedless Preserves
regular distress ink, keeping the cleaned, stencil in place.
Celebration Star Stencil - Imagination Craft
This is a Christmas design but I use it whenever!
Girl was free with Creative Stamping issue 53
Number 18 - Creative Stamping issue 44
 

Wednesday 18 December 2019

Christmas Card share - I know, another!

This card is my favourite!
I just love everything about it.
In fact, it nearly didn't go to it's
intended destination!
 
The images & papers are from a die cut book,
I purchased in The Works last year to make
clear baubles with. (Which I forgot to share)
I love all the colours on this.

So for the easel part, I tried to match the colour
as close as possible using Paperartsy Fresco
paint in Taromilk Tea. I then used a Tim Holtz
stencil (Falling Stars) to create the backdrop.
I die cut the bookplate from aTim Holtz
bigz die.
I distressed with the same paint
& then stamped the greeting on it.
Adding pearls to complete.


For my greeting, I grunged up a star die cut
using the same paint & stamped the 
Apple Blossom sentiment. 


Monday 16 December 2019

Dina Wakley Media - Show Us Your Media Gratitude

A Year of Gratitude Project

Challenge month four

I am grateful for Creativity

I have been poorly for a week & so it
has taken an age to complete this.
My background is heavily influenced by
Lisa Oxley's repeated version of the
Dina Wakley ghosting technique.
I saw Lisa's work, after following a link from 
Niamh Baly, another of my fav journal artists.
 Materials;
DWM heavy body paint in
Lapis, Ocean, Lime & Fuchsia
Dylusions Stencils - Dyalog Stencil it
& Small Leaf Flourish 
DWM Collage Tissue - Backgrounds
Paintbrushes & Garden Angel Ornament
are images from Daphne's Diary Magazine.
My journal pen is a bit rubbish
& you can barely see the journaling.
 It reads, I can never remember a time
in my life when I wasn't creative in some way.
I was always making something right back to being 
a small child. Creativity is my life.

Saturday 14 December 2019

Another

I made two of this design,
obviously I only took a photo of one.

Nice simple design for a friend & also for
old employers, from way back.
 
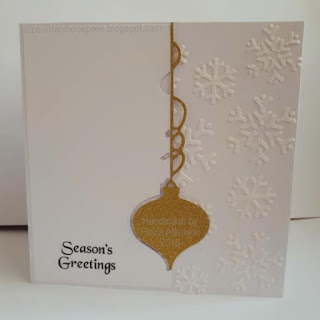
Snowflake stencil - That Special Touch
Peyton Ornament Die - Simon Says Stamp
Golden Molding Paste
Glimmer card stock in Gold.
Greeting also by Appleblossom. 
 
Some people are getting cards that I
made last year. I made extras to give myself 
a head start on this year.
 

Thursday 12 December 2019

More Christmas Card Designs

The next cards are crafty friends.
These Stamping Bella Oddballs
are just soooo cute!!


The backgrounds are stenciled mini masterboards. 
Each card was created the same.
I brayered over the cardstock some gesso. 
Once dry, I began with a snowflake stencil
adding them all over the design in various colours.
I added stenciled words,
in Glacier Ice.
Then more festive images.
Paints - PaperArtsy Fresco Chalk.
Venice Blue / Glacier Ice
Summer Sky / Smurf
Surf's Up / Snowflake
Images coloured using Copic Markers.
Text blocks stamped & cut as steps
for them to stand on.
I really love the feel of the paper with
all the paints stenciled on.
If it appeared too bright, I just knocked 
it back with Snowflake or
Cloud9 if i grabbed the wrong one!!

Tuesday 10 December 2019

My Sister's Card for Christmas 2019

Day four of sharing Christmas makes
& as the title says, today it's the
card I made for sister, Tracy &
BIL, Martin.
 Tracy is a lover of minimalist designs.
I have said this before, but just 
in case you are a new reader,
she really loves clean & simple.
I struggle a bit with CAS, 
but I think I'm getting there.
This one features a big sentiment
from Creative Stamping issue 49.
Texture is Golden molding paste,
with Tim Holtz stencil, Falling Stars.
 Die cut windows are using John Next Door
(John Lockwood) Sam's Starz. 
I fell instantly in love with these.

The inside is the same die set.
The stamp is by Appleblossom.

This is a closer look at the back of the front panel.
I left it free from acetate or vellum.
I deliberately placed my message on the back,
so that she can place a battery tealight,
behind this star.


Sunday 8 December 2019

Day 3 of the Christmas Shares

Today sees the start of handmade cards.
I don't usually make many the same,
but this year, some designs, 
I made duplicates. 
These two are slightly different in size
but one is for my favourite ladies (bees)
at Queen Bee Salon in Scunthorpe
(who I sadly haven't seen since March, 
due to my redundancy)
The other is for my dearest ex-train buddy, 
Claire, who also found herself redundant
in September of this year.
I am in love with this paint by PaperArtsy.
It's called Summer Sky, but seriously,
doesn't it make a fabulous winter shade too!!
I actually shared them with PaperArtsy owner,
Leandra Franich & she agreed it worked very well!

Queen Bee - front
 Tim Holtz Poinsettia stencil
Golden Light Molding paste
Merry Christmas - Sara Davies,
free with Papercraft Essentials issue 166 

Queen Bee - inside
 XCut woodland die cut panels
& fox. XCut Countryside for pheasant.
Same panels.

Claire - front
 Vellum strip,
Hero Arts - Large Script Christmas die

Claire - inside
 Same as Queen Bee. 
Both had Cosmic Shimmer Lustre
in Snow & Ice rubbed onto blue panels
to give soft shimmer.
The panels are made from Mixed Media paper.
It was gesso'd the the paint added.
I didn't go right to the edges so you got
some random whiteness.

Inside both of the cards.

Now I know they can't really be seen,
because I used vellum for my panels
instead of acetate, (I find acetate
doesn't give a soft glow & naturally my frosted
sheets by Tim Holtz were MIA.)
However, I couldn't leave the inside bare.
So I added Tim Holtz regular Distress ink in
Tumbled Glass & Chipped Sapphire
to pieces of card behind the die cut panels.
I used a mountain die free with issue 39,
Die cutting essentials to provide snow
for my Tim Holtz deer to stand on.

 These are luminary cards.
All they have to do is stand the card over
a battery tealight & Voila! 

Saturday 7 December 2019

Second Christmas share.

This time a 3D lantern gift.
I based this on an article I read in
Die Cutting Essentials issue 30.
I made each of the 4 boxes
by determining the die I would use,
 for each of the windows. 
In hindsight, I wish I had gone a touch smaller.
I made the boxes as strips with 
an end tab & bottom tabs.
These bottom ones folded up
& the base was glued inside.
It was hard to get a decent photo,
of all together but they were glued down.
I made a base for them from
sturdy chipboard & as the whole thing is 
40cms long, I had to join two 20cm pieces.
 

Now I don't generally like working in centimetres,
 but this project was made completely that way.
The lids were a nightmare!
In fact, my Dad helped me as he is excellent
at maths being an Engineer.
They needed lids to keep the light
from all escaping out the tops.

Here is a close up of one of the box fronts.
I added Golden Molding paste for show
& used my Glitter Duster to add Rock Candy. 
 
  
Here is a closer look at the lid tops.
I cut the Poinsettia & greenery from a free die set,
with Die Cutting Essentials issue 56.
They have tiny glue blobs & Rock Candy
dusted onto them.

 This is one end, both are the same.

Finally, this is inside the boxes.
I added Rose Gold Crafters' Companion card stock,
so it would reflect inside. 
The glitter battery tealights were a pack of 
four for 99p in Home Bargains.
 Each box is 8cm square with a height of 8cms.
I used free dies from Simply Cards & Papercrafts,
issue 195
Large trees at either end, are by XCut.